
As expected, as the pandemic continues, although it’s starting to show some sign that it’s finally getting under control thanks to vaccines, I don’t plan to go back to the office anytime soon. Also, I don’t plan to attend any conventions or any meets until the pandemic is really under control. This means very low transmission.
With that, I decided to focus on technology projects with vintage computers since they are the rage these days. After all, you can’t get a Ryzen 5000 series or any good graphics cards because of the mining boom and the semiconductor shortage. After playing with Mac OS 9 on the Mac mini G4, it had limitations. The sound volume control doesn’t work, and some games just don’t launch.
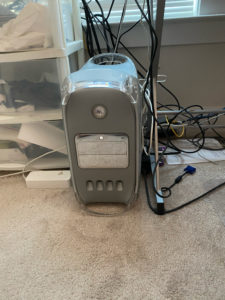
With that, I decided to get a PowerMac G4 and deck it out with upgrades. Yes, the fastest video card that supports Mac OS 9, SSDs, maxed out RAM, and quality sound. I tracked down a PowerMac G4 Mirror Door 2003 model and decided to use that as the base. It used to feature a 1.25 GHz single PowerPC G4 processor, Radeon 9000 Pro 64 MB, 1.75 GB of RAM, and 80 GB hard drive.
I upgraded it with dual 1 GHz PowerPC G4 processor, up the RAM to 2 GB, add 2 SSDs connected to a Firmtek Serialtek 1v4 SATA to PCI-X card, an Adaptec USB2 Connect PCI card, M-Audio Firewire Audiophile audio interface, and an ATI Radeon 9000 Pro 128 MB video card. I did find a Geforce 4 Ti 4600 PC version and tried to flash that. Of course, it didn’t work out in the end, more on that later. This PowerMac G4 is named after Tokai Teio, which is a character from Uma Musume and of course the Japanese racing horse with the same name.
Of course, there are some problems that I encountered while working on this project. While the initial set of upgrades were a success, after three days of use, it wouldn’t power up., Yes, the power supply went bad. However, after receiving a $50 refund for the power supply, buying a refurbished one and sent the dead one back, it’s about a $100 repair.
Believe it or not, PowerMac G4 Mirror Door power supplies aren’t the most reliable thanks to the mere heat, especially in the newer and quieter revision. However, thanks to Andy at acxelectronics, who refurbishes and repair these power supplies, I am back up and running. I think this is a good long-term fix as it allows me to keep the machine stock and it should run for years to come.
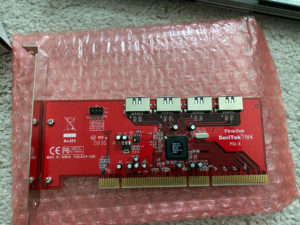
As for the SSDs, SATA to PCI adapters is very rare as nobody really makes them, especially those that can boot into Mac OS 9. Only a few can boot into Mac OS 9. They are the ACARD AEC-6290M/AEC-6890M/AEC-6896M, any Firmtek Serialtek cards, which they still sell from last time I check, and the two port Sonnet SATA PCI Tempo card. The EBay knockoff that a Hong Kong seller does not work with Mac OS 9 and I do not recommend that one. I tried, and it failed epically. While you can get by with a SATA to IDE adapter on a Mirror Door PowerMac G4, it wouldn’t be ultimate if I do that. Also, with a SATA PCI card, it removes any potential compatibility issues across SSDs.
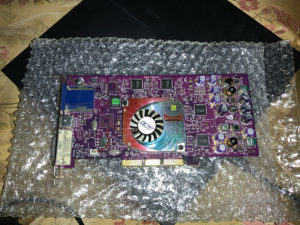
As for the graphics card, I wanted to go with the Geforce 4 Ti 4600. Initally, I flashed a PC version of the ATi Radeon 9000 Pro, which was easy. However, the performance was disappointing since it’s simply a cut down version of a Radeon 8500. However, finding a Ti 4600 was difficult. Sure, there are stores that claim to have them in stock, but in reality, they don’t have them.
I eventually find a PC version of the Geforce 4 Ti 4600 by PNY for $200 on EBay. Yes, it’s overpriced considering most got sold around $150, but I really wanted this card. It took two weeks to get the rom modified with the Geforce 4 Ti Rom Maker, which you can get from the Mac OS 9 Lives site, which is a helpful resource. I created a FreeDOS boot SD card and put it in my Pentium III retro gaming computer. Here are the procedures, which uses a SD to IDE adapter.
- Make a FreeDOS boot disk on a SD card with Rufus. Copy NVFlash files to the SD card.
- Eject SD card from your computer and put it in the SD to IDE adapter. Boot into Freedos with the Geforce card installed
- Type the following command to extract the rom: nvflash -b 4600.rom
- Shut down the computer and eject SD card. Copy the 4600.rom file to your PowerPC Mac running Mac OS X and run the TI Rom Maker.
- Select the rom file you extracted and give the modified rom a name. Copy the modified rom back to the SD card.
- Eject the SD card and put it in the SD to IDE adapter. Boot your computer and FreeDOS and run the following: nvflash -4 -5 -6 4600mod.rom
- Shutdown the computer and remove the Geforce card. Install the Geforce card into the PowerMac. It should now work.
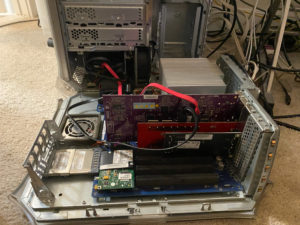
As expected, my luck has taken a turn to the worse. I thought that it would work perfectly, but I noticed that some games crash or won’t start at all.
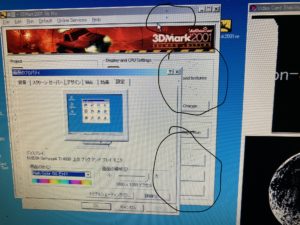

Also, there were kernel panics, eventually with one with graphical artifacts. I flashed the PC bios back to the Geforce card and run some stress tests. This mean running 3DMark 2001 SE and the System Stability Test. As expected, it started to show graphical artifacts. Thankfully, I was able to return the card for a full refund. I suspect it’s from the GPU overheating or bad video ram chips, which of course requires repair. This means getting the same memory chips and a chip soldering station, something I don’t want to do.
With that, my quest to find a beast of a video card has come to an end, at least for now. The only 4600 on EBay at the time of this writing cost way too much and cost almost as a scalped RTX 3xxx video card. As for the Quadro 4, which uses the same NV25 GPU supported by Mac OS 9, someone did a snipe bid for a Quadro 900 XGL I placed a bid on. I tried to do a best offer for $58 for a Quadro 4 700 XGL as I am in no way in hell paying $100 for a 20-year-old video workstation card. The seller ignored my offer, even though he has a poor seller rating. Figures.
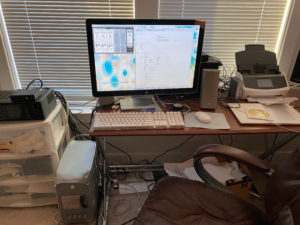
With that, the quest of building the Ultimate PowerMac G4 comes to an end for now. Without the GeForce 4 Ti 4600, I can’t really call it the Ultimate PowerMac G4 that can also game in Mac OS 9. However, there is probably a glimmer of hope that I may be able to get one of these cards from a retro Macintosh community and probably a little less than $200 plus tax. More on that later, if it happens.
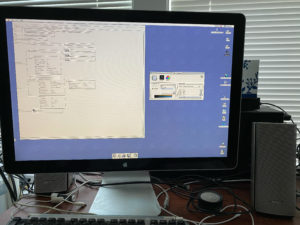
Lastly, you can use modern DisplayPort monitors with your retro computers. You need the StarTech DVI to DisplayPort, which costs $30. It works well with the Apple LED Cinema Display, which uses mini-DisplayPort. While the sound and USB hub works in the monitor along with brightness controls in Mac OS X, the iSight webcam does not. Also, the built-in sound does not work in Mac OS 9 and it shows a message at startup. Not a big deal, but it’s worth a mention.
The final specs, for now:
- PowerMac G4 Mirror Door 2003 Model
- Dual PowerPC G4 1 GHz Processor
- 2 GB of DDR RAM
- 120 GB Samsung 840 EVO and 275 GB Crucial MX300 SSDs connected to a Firmtek Serialtek 1v4 SATA PCI-X Card
- ATI Radeon 9000 Pro 128 MB video card
- Adaptec USB2 Connect USB2 Expansion PCI card
- M-Audio Firewire Audiophile Audio Interface
- Bose Companion 20 speakers
- Apple LED Cinema Display connected to a Startech DVI to DisplayPort adapter.
To be continued? Also, I will be sharing my experiences in building my custom Retro Gaming Pentium III reverse sleeper build. More on that later.
Helpful resources if you plan to do the same:
- Macintosh Garden
- Macintosh Repository
- Mac OS 9 Lives
- 68k Macintosh Liberation Army
- Mac Elite Wiki – for Flashing PC Cards to work in PowerMacs
- Firmtek – Where I got the SATA to PCI adapter that works on Mac OS 9, if you don’t want to flash a SATA PCI adapter or use SATA to IDE adapters.
Nice, I’ve been going through the same thing with a G4 Quicksilver, which I am hoping to use as an OS 9 / early X gaming system, though the Radeon 7500 is a bit limiting. So far I’ve added a NEC USB card, now just deciding between a SCSI or a SATA card. Seems the options are very limited if you want OS 9 compabatbility and SCSI drives arnt exactly common or affordable and some of the SATA cards have issues with Quicksilvers and sleep mode, seems Apple didnt stick to the PCI power specifications.