The Mac Pro dream is now dead at least for now thanks to Apple switching to their own processors. I initially wanted to buy a Mac Pro to replace my unstable Hackintosh. However, Apple decided to ditch Intel. As a result, it would be completely foolish to buy an expensive workstation that would become obsolete in two years. With that, I decided to update my home network to not only have a hypervisor server, which will host various servers and home lab, but also the wired and wireless network.
Believe it or not, since I moved into my new townhome back in the end of January, it was pretty basic. It consisted of a Verizon G3100 router provided as a free rental since I have the gigabit internet plan. Also, I have my Mac mini acting as a file and Plex server hooked up with my laptops/desktops connected via ethernet.
Of course, the main problem with this setup is the wireless sucked, especially on the third floor. Since I wanted ethernet going to all rooms, the router needed to be on the first floor in the data closet. Moreover, the router is pretty limited in what you can configure on it. You can’t even configure any virtual LAN, which is important if you want a home lab to separate your main network from your lab.
Since I am not spending the money on a Mac Pro, I have a good amount of money saved up because I can’t really spend money on anything due to covid19. Importing anything from Japan is nearly impossible with Japan Post suspending shipments, unless you use a private carrier, which can get very expensive. With that, I decided to not only build my home lab to run X86-64 virtual machines when Apple switches to their own processors, but also have a dedicated environment to learn new software to help improve my IT career. I also plan to get a Mac mini with Apple Silicon whenever that comes out.
I decided on the following:
- INTEL NUC10I7FNH1 – $559.99 (Microcenter)
- Team Group 32 GB 2666 Mhz So-DImm – $139.99 (Microcenter)
- CRUCIAL 1TB MX500 2.5 3D NAND SSD – $114.99 (Microcenter)
- Corsair Force MP510 nVME SSD- $64.99 (pulled from my Desktop, Amazon)
- Random 32 GB USB Flash Drive – $26.99 (A big ripoff, but needed to get the server up and running)
- 25 FT Cat6 Cable (5 pack) – $29.99 (Microcenter)
- 25 FT Cat6 Cable – $22.99 (Microcenter, for connecting the Unifi AP Lite)
- Ubiquiti Unifi AP Lite – $78.99 (Microcenter)
- Ubiquiti Unifi Dream Machine Pro – $379 (Directly from Ubiquiti)
- Cat 6 RJ45 Couplers (To extend the wiring in the closet to the cables that connect the wall jacks) – $10.99 (Amazon)
- AmazonBasics Snagless RJ45 Cat-6 Ethernet Patch Internet Cable – 3-Foot, Blue, 5-Pack – $9.25 (Amazon)
Total: $1438.16, $1373.17 in new equipment
Existing Equipment:
- 2014 Mac Mini with 2.4 GHz Intel Core i5, 16 GB of RAM, 256 GB Samsung 850 Pro
- OWC Thunderbay with four 3 TB WD Red Hard Drives
- 8 TB G-Tech Hard Drive
- Cyberpower UPS
- 1x Netgear 5-port Unmanaged Gigabit Switch and 1x 8-port Unmanaged Gigabit Switch
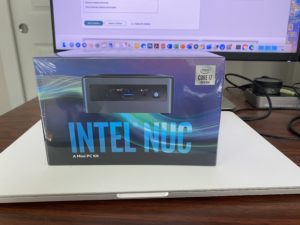
I decided to get most of the stuff from Micro Center mostly because I can pick up the items the same day. Believe it or not, I live 20 minutes away from one, which is in Rockville. Most of the prices there are close to what you can find on Newegg. Since you have to pay sales tax online, there is no point waiting for the items to ship.
So, why I decided to go for a 10th generation Frost Canyon Intel NUC over a used server. Simply put, a used server such as a Dell PowerEdge R710 while having a lot of processing power and memory will use a lot of power. Those energy costs will pile up rather quickly compared to just building a new one.
While the Intel NUC is a bit more expensive, it uses less power. I decided to opt for the Core i7 version of the NUC since it will provide plenty of capacity for my severs while roughly having the same performance as my 2018 15-inch MacBook Pro or an Intel Core i7 5820k Desktop I have, which uses substantially more power.
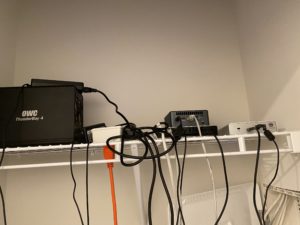
Overall, the whole setup with my Mac mini with the OWC Thunderbay 4 and an external HD, NUC, and Unifi Dream Machine Pro uses around .066 KWh or 66 watts. Also, I decided to go all solid-state storage on my NUC for fast performance.
The NUC runs VMWare ESXI 7, which hosts a Windows Server 2019 (Active Directory, reverse proxy and DNS), a Windows 10 virtual machine, and a Red Hat Enterprise 7.8 server for web development. Also, it’s relatively easy to set up. I wanted to use a SD card to boot, but I couldn’t boot using the internal card reader. A USB-C dongle would work, but it’s silly to use such an expensive adapter just to boot from a SD card. I opted for a flash drive, which I paid a bit of money for. I wanted to get the server up before I left on my mini vacation. Otherwise, the performance is good. Note that I needed to download and install the updated NE1000 drivers on a different computer so the adapter would work on the NUC.
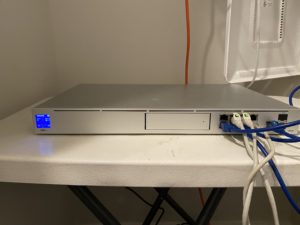
As for the router, I decided on the Ubiquiti Unifi Dream Machine Pro. Unfortunately, Apple gave up on the wireless router market, which is a shame since their routers were rock solid. Since most on the consumer routers are complete garbage, I decided to go all in with Ubiquiti’s Unifi line of Enterprise routers and access points since I heard good things about it. I wanted this since not only I can manage my access points, but it provides an Intrusion Detection/Prevention system to stop hackers from attacking your network. Also, there is stateful packet inspection, which you can use to identify various types of traffic coming into your network.
Since I have gigabit internet, I don’t want to kneecap my internet speeds with the regular version of the Dream Machine, which only supports 800 mbps with IDS/IPS on. The Dream Machine Pro can do up to 3 Gbps with the IPS/IDS turned on. While the Pro ($379) is a bit more money, the features it provides make it a no-brainer, especially given that a Verizon G3100 already costs $299 new with only 90-days of warranty.
While there were a few hitches trying to set it up, I got it working in 15 minutes. I done all the setup on my iPhone, which is really nice. You can manage and monitor your network from the web interface and the Unifi Network app.
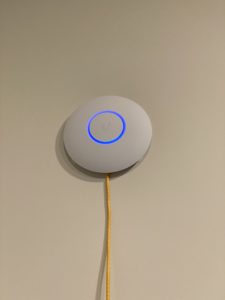
Overall, the setup is pretty good, and I am currently satisfied. As expected, the home network setup is never complete. I only got one Unifi AP Lite for the time being and waiting for the Wifi6 version. I mounted Unifi AP Lite with 3M Command Strips since I do not want to make any holes in the wall. Overall, this setup is way better than what the Verizon G3100 can come up with.
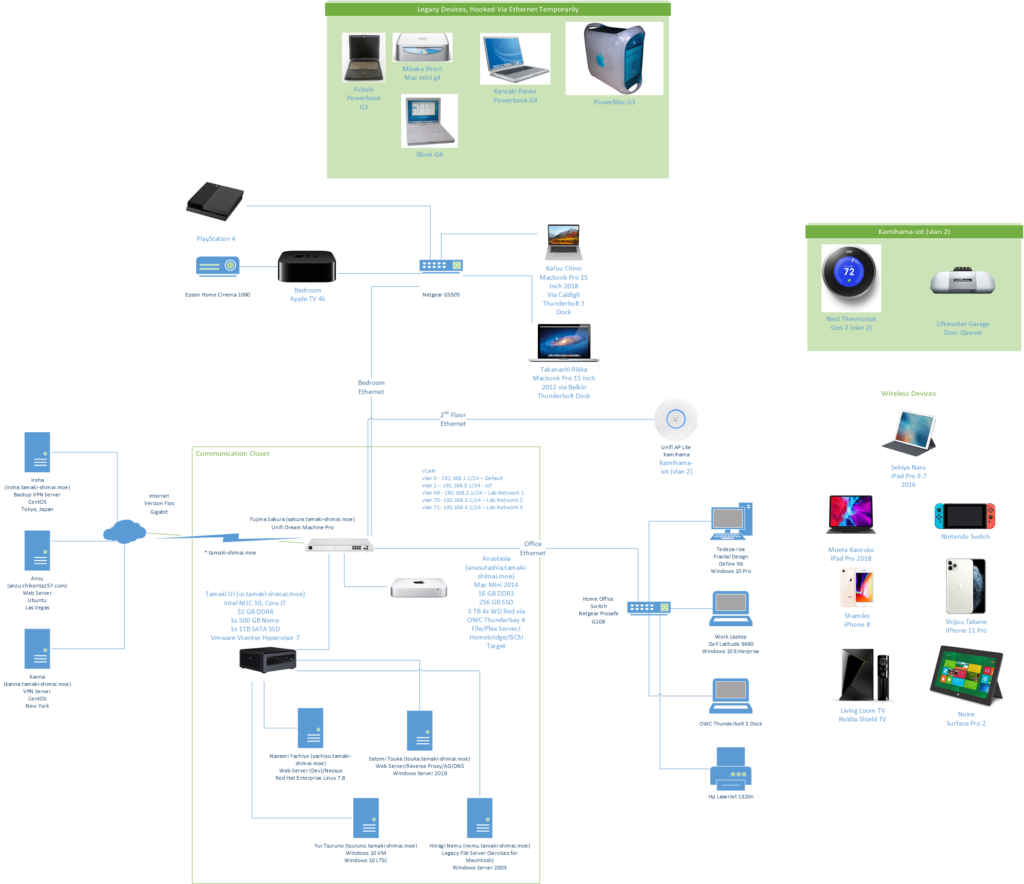
Network Diagram
Future Plans
- Add another 32 GB for the Intel NUC, brining it up to 64 GB
- Obtain another OWC Thunderbay 4 Thunderbolt 2/3 enclosure for the Mac mini to add the removed hard drives from desktop. Will be replaced eventually with Seagate Ironwolf 4 TB HDs in Raid 5 (I considering not using any more WD Reds since the new ones uses SMR, which is unsuitable for RAID.).
- Obtain a Mac mini that uses Apple Silicon with at least 32 GB of RAM and 10-Gigabit Ethernet as a desktop host
- Obtain another Intel NUC Core i7 for use for VMWare VCenter from a VUG Advantage subscription, after I receive VCenter training. Currently waiting for the Tiger Lake models.
- 10 Gigabit Ethernet for servers and the Macbook Pro laptop (Bedroom and home office).
[…] Aside from that, I have finally finished the first part of the Pocket Monsters Sword and Shield Expansion Pack. Now that Gust and Tecmo Koei have finally announced a sequel to Atelier Ryza last week, it’s time to start working on it during the weekends. Also, the first phase of setting up my home lab is now complete and you can read more about it on my side blog. […]